Wednesday, May 27, 2009

Gin & Lemonade

I made a couple batches of this for Memorial Day and they went FAST. This is a great recipe that everyone always enjoys. Even picky drinkers like it because it tastes just like lemonade. And who doesn't love lemonade?

I would put a picture but it just looks like lemonade in a glass.

INGREDIENTS:
12 oz diet sprite/7up
4 oz gin (or more)
1 pkg dry lemonade
Ice

Put first 3 ingredients in a blender. Fill blender with ice. Blend until you reach desired consistency.

Enjoy!

VERDICT:
This is my all time favorite summer drink. It's perfect for any occasion and everyone loves it. Seriously, I have yet to find a person who does not adore this drink and beg for the recipe.

This is a must have for your next get together!

SOURCE:
My Nanny J!

Tuesday, May 26, 2009

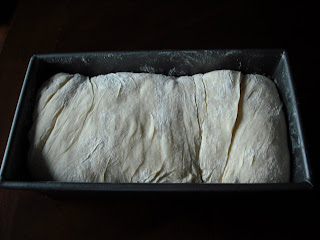
Sandwich Bread


So I'm just starting to really get involved in this whole bread making business. I have had great success (and rave reviews) with the Garlic Knots. Then I saw this recipe on my Reader and was instantly intrigued.

For starters, Annie's blog is awesome (seriously, I have no idea how she has so many hours in her day) so I knew the recipe would be great. But I was overall interested in seeing how hard it would be to make our own sandwich bread.

I copied this recipe from her site but put my notes in italics.

INGREDIENTS:
3 1/2 c AP flour + extra for surface
2 t salt
1 c warm whole milk (about 110)
1/3 c warm water (about 110)
2 T butter, melted
3 T honey
1 envelope (about 2 ¼ tsp.) instant (or Rapid Rise) yeast

Adjust an oven rack to the lowest position and heat the oven to 200. Once the oven temperature reaches 200, maintain the heat for 10 minutes, then turn off the oven.

Mix flour and salt in the bowl of a stand mixer fitted with the dough hook. Mix the milk, water, butter, honey and yeast in a 4-cup liquid measuring cup. Turn the machine to low and slowly add the liquid. When the dough comes together, increase the speed to medium and mix until the dough is smooth and satiny, stopping the machine two or three times to scrape dough from the hook, if necessary, about 10 minutes.

(After 5 minutes of kneading, if the dough is still sticking to the sides of the bowl, add flour 1 tablespoon at a time and up to ¼ cup total, until the dough is no longer sticky. I added flour and I don't think I should have. It would have been fine without it, just a tad bit stickier than I preferred.) Turn the dough onto a lightly floured work surface; knead to form a smooth, round ball, about 15 seconds.

Place the dough in a very lightly oiled large bowl, rubbing the dough around the bowl to coat lightly. Cover the bowl with plastic wrap and place in the warmed oven until the dough has doubled in size, about 40-50 minutes.


On a floured work surface, gently press the dough into a rectangle 1 inch thick and no longer than 9 inches. With a long side facing you, roll the dough firmly into a cylinder, pressing with your fingers to make sure the dough sticks to itself. Turn the dough seam-side up and pinch it closed. (I am 99% sure I did this step wrong as well.)

Place the dough seam-side down in a greased 9×5-inch loaf pan and press it gently so it touches all four sides of the pan. Cover with plastic wrap; set aside in a warm spot until the dough almost doubles in size, 20-30 minutes.


Keep one oven rack at the lowest position and place the other at the middle position and heat the oven to 350. Place an empty baking pan on the bottom rack. Bring two cups of water to boil in a small saucepan. Pour the boiling water into the empty pan on the bottom rack and set the loaf onto the middle rack. Bake until an instant-read thermometer inserted at an angle from the short end just above the pan rim into the center of the loaf reads 195, 40-50 minutes. Remove the bread from the pan, transfer to a wire rack and cool to room temperature.


Slice and serve. (And don't forget to take the pan of water out of your oven!)

VERDICT:
Oh. Em. Gee.

This bread is phenomenal. The honey gives it just a hint of sweetness. And it's definitely dense enough to hold up to any sandwich you can think of.

I wish the crust would have come out a little prettier but I emailed Annie about it and she told me it could be the use of too much flour. The humidity could also be affecting it. Which makes sense because South Louisiana is very possibly the most humid place on the planet. So I'll definitely take that into consideration when I make it again. And I'll definitely be making this again very, very soon!

Thanks, Annie!

SOURCE:
Annie's Eats

Tex-Mex Dip


My mom has been making this dip for as long as I can remember. Some people refer to it as 7 layer dip but since it doesn't have 7 layers, I feel like that is not correct. I also once saw peas in a 7 layer dip and I've been scarred every since. She always called it Tex-Mex dip so I will too.

INGREDIENTS:
1 can bean dip (from the chip section)
1 pkg taco seasoning
1 16 oz container sour cream
Jalapenos, chopped
1 tomato, chopped
1 bag shredded Mexican cheese
black olives (I left this out)

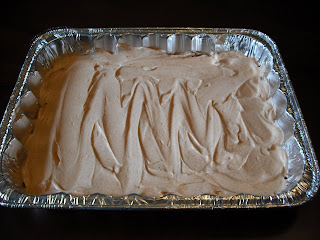
In a shallow container (preferably with a lid), take a spatula and spread the bean dip evenly on the bottom of the pan.

In a separate bowl, mix the sour cream and taco seasoning. (Or if you're brave, omit the bowl and just mix the seasoning right into the container of sour cream.) Spread this on evenly on top of the bean dip.


Sprinkle desired amount of jalapenos and tomatoes on top of sour cream layer. This is where you would also add black olives if you're into that sort of thing (I am not).

I started adding cheese before I took a pic of just the jalapenos and tomatoes.
Whoop-sey.

Sprinkle bag of cheese over the top. Refrigerate until ready to serve.

Serve with original Cheese Doritos or Tostitos. Or whatever other chip you have on hand. Or a spoon. Just serve it.

VERDICT:
As always, this was a hit. There is a reason Mom has made this for 25 years and counting.

This is definitely a dip that you can "make your own" with different veggie toppings. I love the heat the jalapenos give though.

Yum!

SOURCE:
Mom

Baked Oatmeal


I have a really, really bad habit of not eating breakfast in the mornings. I know, I know...If I just got up 5 minutes earlier, I wouldn't be so rushed and then I wouldn't want to eat a horse by 10:30. But I like my sleep so I was hoping to find an alternative option.

I kept seeing baked oatmeal pop up on blogs but I wasn't sure if it was meant to be eaten in bar form or in a bowl. Erica answered that for me in her post and I decided to give it a shot!

INGREDIENTS:
2 c rolled oats
2 c milk (I used skim)
2 eggs
1 t baking powder
1/4 t salt
Pinch nutmeg
2 T honey
1/2 c dried cranberries
1/2 c chopped hazelnuts
1/3 c semisweet chocolate chips

Preheat oven to 375.

Mix all ingredients together in a bowl. (I had about a palmful of chocolate chips left in the bag so I just threw them in, hence the 1/3 c instead of 1/4 c like the original recipe.)

Pour into a greased square baking pan. Bake for 30-40 minutes or until the top is golden brown.

VERDICT:
These are pretty good! I think I was expecting more of a granola bar texture and but it's definitely more like oatmeal. I LOVE the hazelnut flavor as well as the chocolate chips. However, I am not a fan of the cranberries. Next time (and there will be a next time) I will use a different fruit. I think raisins as well as a teaspoon (or two) of cinnamon would be excellent.

I grabbed one this morning on my way out the door and heated it for 30 seconds and it was very good warmed.

Mr. ShoeFanatic hated them. Oh well, more for me!

ETA, 5/27/09: Do not make this. It smells like moldy rice today. I'm about to vomit.

SOURCE:
Erica's Kitchen Adventures

Grilled Fish Tacos


I'm pretty sure I have expressed my love for Coyote Blues in my Duck Quesadilla post but in case I haven't...

I am madly in love with Coyote Blues.

Best.Mexican.Food.Ever.

EVER.

This dish was inspired by their grilled fish tacos. I'm not even sure if it qualifies as a recipe because it's that easy. You can be the judge of that I suppose.

INGREDIENTS:
7 trout filets (or whatever white fish you have on hand)
Salt
Black Pepper
Olive oil
Lemon juice
Tortillas
Sour cream
Homemade Salsa
Avocados
Jalapenos
Shredded Cheese

In a shallow dish, season fish with salt, pepper, olive oil and lemon juice (or with your preferred fish seasoning). Let sit for about 30 minutes.

Grill (or broil) until flaky. About 7 minutes total.

Dress taco with remainder of ingredients (or however you desire). I actually forgot the jalapenos because I was starving but they are an integral part in the famous Coyote Blues tacos.


VERDICT:
This is so good. I really can't even find the words to express how great of a meal this is.

And if you eliminate the sour cream (or get light) and use a whole wheat tortilla, it's really not bad for you!

Make me happy and make this soon. Your tastebuds will thank you.

SOURCE:
Coyote Blues

Monday, May 25, 2009

Weekend Update

Good evening! Everyone remember my post from last Thursday? Awesome. Here's what I did over the weekend:

1. Homemade Sandwich Bread
2. Doggy Treats
3. Baked Oatmeal
4. Tex Mex Dip
5. Gin & Lemonade

And I'm stuffing my face with Pasta Salad as I type (there's a picture there now). Pretty successful weekend, no?

Check back for these recipes soon!

Menu Monday

Happy Memorial Day!

I hope everyone is enjoying their day off and grilling it up by the pool. Remember to thank a soldier for your freedom!

Monday--Leftovers
Tuesday--Dinner with Friends
Wednesday--BBQ Chicken Quesadillas
Thursday--Pork Jambalaya (Mr. ShoeFanatic)
Friday--Leftovers
Saturday--Penne a la Betsy or Shrimp Enchiladas
Sunday--Leftovers

ETA, 5/27/09: I changed my menu because...well, because I can.

Sunday, May 24, 2009

Dog Treats


I starred this a couple weeks ago and have been dying to make them but was putting it off for a couple reasons.

1) Because Procrastination is my middle name
and
2) I didn't want to have to go in the attic to dig out our cookie cutters. Why they are in the attic is another story.

But then a leisurely trip to Sur la Table solved all of that!

INGREDIENTS:
1 c milk (I used whole)
1 c peanut butter
2 c whole wheat flour + some for rolling
1 T baking soda

Preheat oven to 350.

Mix milk and peanut butter in a medium bowl until combined. Stir flour and baking soda in a small bowl. Slowly add dry mix to wet mix until all combined.

Roll out dough onto a lightly floured surface and cut into desired shapes. Or just create small discs. I found this cookie cutter that morning and was insistent my dog would like them better if it was shaped like a bone.

Bake for 20 minutes. Let cool for at least 10-15 minutes before giving to your dog.

Please drop it, Mom!

VERDICT:
Well, the dog loves them. Seriously, she just sits and stares at the container holding the treats. I even gave a couple to some fellow dog owners; they were a hit!

I tasted them and can honestly say that it was very bland and not tasty at all. So don't feel the need to taste it. You can just take my word for it.

Spinach Pasta


Let me first apologize for the totally craptastic pictures. I took these the next day and they are really not doing this dish justice.

Now that I've dabbled just a little in the breadmaking world, I felt I was ready to blow the dust off of my pasta rollers and make some noodles! Only I couldn't take the simple route. Nope, I wanted to make spinach pasta. I am in love with green pasta. I just looks so pretty!

I'm really bummed at how terrible these pictures are. Guess I'll just have to make more!

INGREDIENTS:
1 10 oz pkg frozen spinach, cooked
1 T water, plus more as needed
1 T olive oil
4 eggs
4 c sifted AP flour

Wring all the liquid out of the spinach until it feels very dry. Finely chop spinach in the food processor or blender.

In the bowl of a stand mixer fitted with the paddle attachment, combine the spinach, 1 T water, olive oil, eggs, and flour. Mix on low speed until the ingredients are well mixed and a dough begins to form. If the mixture is not coming together add more water, 1 tablespoon at a time just until the dough is formed. Remove the dough from the mixer and transfer it to a work surface. Knead 1-2 minutes by hand.

Divide the dough into eight equal pieces. Flatten each piece with your hand until it is flat enough to go through the pasta sheet roller at its widest setting (usually setting number 1). Run one piece of the dough through the sheet roller on number one once (keep the rest of the dough covered with a kitchen towel to prevent drying out). Remove the sheet from the roller and lay it on the work surface lengthwise. Bring both outside edges into the middle, folding the sheet into thirds. Flatten with hands until flat enough to go through the sheet roller on the widest setting once again. Pass the folded sheet through the roller, open end first.

Set the roller to the next setting (number 2). It's just a tad bit narrower. Everytime you run the dough through, set your roller back one number. We usually stop at number 6 because it's thin and becoming difficult to handle. But if your dough has reached the thinness you desire before number 6, you can stop there. (If at any time the sheet becomes too unwieldy, simply cut it in half and work with each half individually.)

Repeat the entire process with the remaining segments of dough.

Once all the pasta sheets are finished, pass through a noodle cutter.

Cook the pasta in a large pot of salted boiling water until al dente, 2-5 minutes. (I recommend testing a piece at a time, mine took even longer.) Drain well and serve.


VERDICT:
This pasta is truly amazing. I don't know if it tastes so good because of all the labor that goes into it or if it's just THAT good but I could not stop eating it! We had some friends over when we made this (fellow blogger Kim and her husband; have you gone to her blog yet?) and even they loved it! And Kim doesn't eat spinach!

There is definitely work involved but the quality is so worth it. I may never buy pasta again!

I will admit that I was afraid of it not coming out like I had imagined. But it was really, really easy! It really only took about an hour to make and we got a LOT of pasta out of it. Definitely try this soon!

SERVED WITH:

SOURCE:

Thursday, May 21, 2009

This Weekend

So I was scrolling through my Reader (have I mentioned how great that thing is?) and saw at least 50 things I want to try NOW. I narrowed it down to 5 for the weekend. Here's what I'm thinking about:

Sandwich Bread: White or Wheat? (I haven't decided which one yet.)
Treats for the Dog
Pasta Salad (I've been craving it)
Baked Oatmeal (to grab for breakfast during the week)
Monkey Bread from scratch (It's a Cooks Illustrated recipe so no clicky)

And depending on what happens for Monday, there could be drinks and a dip made as well. We shall see. I'm posting this so I can be held accountable if I don't make at least 2 of the things on this list.

Happy Thursday!

Wednesday, May 20, 2009

Homemade Brownies


I found Elizabeth's blog a couple weeks ago and was instantly enthralled. She's a South Louisiana girl (like me!) and most of her recipes have a bit of authentic Cajun/Creole flair which is hard to find in the blogger world! This recipe is not Creole or Cajun but it does have one of my favorite ingredients. Chocolate!

I starred it in my Reader the moment I saw it and since we were having leftover Chicken Enchiladas, I took advantage of not having to cook and baked instead!

INGREDIENTS:
1 c sugar
2/3 c butter or margarine
1/4 c water
24 oz semi-sweet chocolate chips, divided (approximately 4 c)
1 t vanilla extract
1 1/2 c AP flour
1/2 t baking soda
1/2 t salt
4 eggs
1 c nuts (optional) (I left this out)

Preheat oven to 325.

Heat first 3 ingredients over high heat until sugar is completely melted. Add 2 c chocolate chips and vanilla. Whisk until mixture is smooth. Remove from heat and let cool for 15 minutes.

It will smell really, really good but resist the urge to lick your whisk. It's really hot!

Meanwhile...

Mix flour, baking soda and salt in a separate bowl. When chocolate mixture is cool, add to flour mixture. Stir until well blended. Add in eggs and nuts (if using) and stir until well mixed.

Pour batter in a 9x13 dish and bake for 30 minutes.

Sprinkle remaining 2 c of chocolate evenly over warm brownies and let stand for 5 minutes to soften. Spread melting morsels over the top to cover the brownies.

VERDICT:
Whoa. I had no doubt these would be good but I didn't realize they would be so addicting! I seriously can't stop eating them.

Someone take the pan away from me please. And grab a glass of cold milk on your way out. You're in for a treat!

SOURCE:

Tuesday, May 19, 2009

BBQ Chicken Quesadillas


When I saw this recipe pop up on my Google Reader (aka the best thing ever) last week, I knew I had to try it. We love all things Mexican related in this household!

I did not have Vidalia onions in the house so I used yellow. It was still really good but I definitely can imagine that it would have been that much better with the Vidalia's. Mr. ShoeFanatic also created a rub/marinade for the chicken. He's badass like that.

INGREDIENTS:
1 1/2 vidalia onions (I used 1 large and 1 small yellow onion)
2 T olive oil
2 T honey
4 chicken breasts, cubed
Marinade (below)
1/2 c BBQ sauce (we used KC Masterpiece Honey)
6 ten inch tortillas
Shredded Mexican cheese blend
Sour cream

MARINADE INGREDIENTS:
1/2 T Salt
10 grinds black pepper
1/2 T garlic powder
1/2 T onion powder
1 t red pepper
1/2 T smoked paprika
1 T Brown sugar
2 T apple cider vinegar
5 dashes hickory liquid smoke

Mix together rub ingredients. Coat chicken well and set aside.

Slice your onions into rings and in a large skillet, cook rings in 1 T of the olive oil over med-high heat until they start to turn golden brown. Turn the heat down to medium and caramelize for about 20 more minutes. Add in the honey about 5 minutes before they are done. Remove from skillet and set aside.

Add the other T of olive oil back to the skillet and add the chicken. Cook the chicken on medium heat for approximately 7 minutes and then stir in the BBQ sauce. Let simmer for another 7-10 minutes. Remove from heat when done.

Assemble tortillas with chicken, onions and cheese. Grill in a nonstick skillet on each side until cheese is melted and tortilla is golden.

Serve with sour cream.

VERDICT:
This was fantastic. If you even remotely like BBQ chicken pizza, you will love this. And I will be honest, I was very leery about the onions in this dish but between the caramelization and the honey...they were so sweet and no onion-ey flavor at all!

Mr. ShoeFanatic gave this 2 thumbs way up and begged me to cook it again!

SOURCE:
Cooking This and That

Monday, May 18, 2009

Menu Monday

Good Morning! Here's what we're eating this week. Hope everyone has a great Monday!

Monday--Texas Chicken Quesadillas
Tuesday--Chicken Enchiladas
Wednesday--Leftovers
Thursday--Chicken Rice & Gravy w/Lima beans (Mr. ShoeFanatic)
Friday--Shrimp Fettucini (Mr. ShoeFanatic)
Saturday--Leftovers
Sunday--Grilled Fish Tacos

Wednesday, May 13, 2009

Pimento Cheese Stuffed Burgers


You see the orangey gloop on the right side of the burger? In the words of Guy Fieri*...That's money, baby!

We first cooked these burgers long before we were engaged. And they are so, so, so good. And so, so, so not good for you. But we don't eat them often so it's ok.

Next time you get the urge to fire up the grill, I highly recommend you try these out!

INGREDIENTS:
1 1/2 lbs ground chuck
Salt & Pepper
4 T pimento cheese
Burger toppings

Season meat to your liking and make 8 (relatively thin) patties. Put 1 T pimento cheese in the center of 4 of the patties. Cover each pimento cheese patty with a non-pimento cheese patty. Seal the edges as best you can.

Grill on aluminum foil for approximately 6 minutes on each side or until they are cooked through.

Serve with toppings of your choice. I put jalapenos, provolone cheese**, mayo, ketchup and tomatoes. Mr. SF put all of the above and Tabasco. We like things spicy in our household.


*I can't believe I just quoted him. I can't stand that guy.
**Yes, I realize I put cheese on a cheese stuffed burger. Don't judge.

VERDICT:
At the risk of sounding crude, this burger is like a culinary orgasm.

I don't think I need to elaborate further.

ETA: I think part of what makes this so good is the kind of pimento cheese you use. If you are in the Baton Rouge area, I HIGHLY recommend using the pimento cheese from Calvin's Bocage Market. And while you're there, pick up some chicken salad. It will change your life.

SOURCE:
Kraft Magazine

Pasta Salad, Round II


I'm officially a pasta salad freak. It's all I want to eat! So when I came across this recipe, I was dying to try it!

INGREDIENTS:
1 bag pasta shells
Splash of olive oil
1/2 pack pepperoni
Parmesan Cheese, freshly grated

Boil pasta in salted water. Drain in a colander but DON'T RINSE. You want the starch so the dressing coats the pasta. Let pasta cool a bit and add olive oil, pepperoni, cheese and some of the dressing. Just eyeball the dressing. Stick in fridge for it to cool.

Toss in some more dressing just before serving.

VERDICT:
It's ok. I think I like the first one better though. Not that it's bad by any means! I'm not a huge fan of Italian salad dressing and I think that's what is getting to me. I thought it was going to be more basil/cheese flavored. I also think it would be better with bigger chunks of meat in it.

All in all, it's a good and very easy dish with lots of Italian flavors.

SOURCE:

Monday, May 11, 2009

Menu Monday

Good morning! Hope everyone had a nice weekend and got to spend some quality time with the mothers in your life. We stuffed ourselves on boiled crawfish and crabs with Mr. ShoeFanatic's mother and 2 grandmothers. It was a very lovely day.

Monday--Mrs. SF, dinner with friends; Mr. SF, on his own.
Tuesday--Pimento Cheese Stuffed Burgers & Pasta Salad
Wednesday--Mr. ShoeFanatic does not know what he's cooking yet
Thursday--Mr. SF, leftovers; Mrs. SF, Grey's finale Party!
Friday--Lasagna Rolls
Saturday--Texas Chicken Quesadillas
Sunday--Leftovers

ETA: Just remembered that I'm going to a Grey's finale party on Thursday!

Friday, May 8, 2009

Mashed Potatoes

*picture to be added later*

My mom has been making these for years. They are so yummy and not difficult at all. I will never make instant because the extra time spent on these is worth it.

INGREDIENTS:
8-10 medium potatoes, peeled and cubed
1 stick butter
Milk
Salt

Bring your potatoes to a rolling boil in a big pot of salted water. Let them boil for at least 10 minutes. You can check them with a fork to see when they are tender enough.

Drain in a colander. Put potatoes, butter and at least 1/2 c milk in your stand mixer and using the paddle attachment, turn it on med speed. Add milk and salt to reach desired consistency and taste.

VERDICT:
Just like Mom used to make!

SOURCE:
Mom

PW's BBQ Meatballs


So even though my first PW recipe was a total flop, I still wanted to make these meatballs. I mean, look at them. Don't you just want to swim in that goodness?

However, I did make a few changes. For one, I did not include onions. I hate onions in my sauce and I wasn't all about them in my meatballs. So I used onion powder instead. I also doubled her sauce recipe. I read somewhere (and I can't remember where) that the sauce didn't make a lot. And I love sauce.

Other than that, these are the real deal.

INGREDIENTS:
1 1/2 lb ground beef
3/4 c rolled oats
1 c milk
Onion powder
Salt
Black pepper
Flour
Canola Oil

SAUCE:
2 c ketchup
4 T sugar
6 T white vinegar
Onion powder
Tabasco
4 T worcestershire sauce

Preheat oven to 350.

In a bowl, mix your beef, oats, milk, onion powder, salt and black pepper. Stir/fold until well combined. Using a small scoop, make the meatballs (I got 28 out of this) and place on a cookie sheet.

Put the cookie sheet in the freezer while you make the sauce.

In a small bowl, mix together all your sauce ingredients. Stir well. Set aside.

Get a plate and put some flour on it. I think I used about 2 cups. Also get a cast iron skillet out and start heating up the canola oil. Last, spray a 9x13 baking dish with nonstick spray and sit that next to your skillet. Ok, you're ready.

Take the meatballs out of the freezer and dredge each of them in flour. Put 1/3 of your meatballs in the skillet to brown. Don't cook them all the way through, just brown the outsides. As they brown, place them in the casserole dish. Repeat for the remainder of the meatballs.

(My kitchen smells like heaven right now.)

Pour sauce evenly over meatballs and bake for approximately 45 minutes.

(I want to bottle the aroma.)


VERDICT:
Holy mother of all things beefy...this was fantastic! It's just gravy that my kitchen smelled divine for hours. I seriously can't wait to get home and eat them again for supper tonight.

You should make this NOW!

SERVED WITH:
Mashed Potatoes
Hoagie Buns

SOURCE:

Thursday, May 7, 2009

Chicken Parmesan

Yum, yum, yum. We have been cooking this for years. It's one of the few things our picky nieces will actually eat so I "think" we started cooking this one of the weekends they came over. Regardless, it's cheap, easy and delicious.

Totally my kind of meal.

INGREDIENTS:
2 eggs
2 T water
4-6 chicken breasts
Seasoning (salt, black pepper, red pepper, garlic powder)
Panko bread crumbs
Olive oil
1 jar spaghetti sauce (we like Prego)
Mozzarella cheese, grated
Parmesan cheese, grated
Pasta (we used thin spaghetti)

Preheat oven to 350 degrees.

Whisk eggs with water in shallow dish. Set aside.

Season chicken to your liking. Dip each breast in the egg mixture then dredge in bread crumbs till well coated. Set aside until all breasts are coated.

Heat olive oil in skillet on stove. Set a wire cooling rack inside a half sheet pan to prepare for baking.

Brown chicken in the skillet, 2 breasts at a time for 2-3 minutes on each side. Chicken will not be cooked all the way through. Set on top of your cooling rack contraption. Repeat for each breast.

Top each breast with 2 T sauce and 1 T of each cheese. Bake for 10 minutes.

Heat the remainder of the sauce in a saucepan. Season to your liking. Serve over pasta.

VERDICT:
I could eat this chicken for days. It is soooo tender and the Panko is soooo good and crunchy.

This should seriously take the place of any chicken parmesan recipe you already have.

Seriously.

SOURCE:
Mr. ShoeFanatic

PW's Creamed Spinach


So, my good friend (and fellow blogger) Brittany, turned me on to Pioneer Woman. And now I am obsessed. I want to be just like her!

So when I came across her recipe for Creamed Spinach on the same day Mr. ShoeFanatic requested steak...well, if that's not fate, I don't know what is.

INGREDIENTS:
1 stick + 3 T butter
8 T AP flour
1/2 sm onion, finely chopped
3 garlic cloves, diced
2 c milk
24 oz baby spinach
Salt, black pepper & red pepper
Nutmeg, freshly grated

Melt 1 stick of butter in a pot. Sprinkle in flour and whisk together. Cook over medium heat for five minutes or until light golden brown.

Add onion and garlic and stir together, cooking for another minute. Pour in milk, whisking constantly, and cook for five minutes while you cook the spinach.

In a separate pot, melt 3 tablespoons butter in a separate pot. Add spinach in increments until all incorporated, and cook until wilted but not soggy, about 4 to 5 minutes.

Season the cream sauce with salt, pepper, and nutmeg. Add spinach to the cream sauce, stirring gently to combine.

At this point, it smelled and looked absolutely delish. The creaminess was perfect. But Mr. ShoeFanatic wanted to taste it for seasoning. Fair enough. We decided it needed more salt. Here is where things started to go south.

Before I knew what was happening, my husband had literally poured half the box of salt in my creamed spinach! My jaw hit the ground as he smugly stated, "Just trust me."

So I picked my jaw up and trusted him.

And it was too salty. Much, much too salty.

So he added more milk.

Still too salty. And now too liquidy.

So he added more wilted spinach.

And it was just a tad less salty. But still very liquidy.

Bottom line: The man ruined my creamed spinach. And then he served me fatty meat. I ate the majority of my potato though.

So I'm not doing a verdict for this post. I think it could have been a fantastic dish and I am looking forward to making it again. Alone.

SOURCE:
The Pioneer Woman

Wednesday, May 6, 2009

Spaghetti & Meatballs


I have a confession to make. I rarely make my own sauce. 95% of the time I will use Prego. It's just so darn good and convenient!

But this week, several things happened to detour me from my favorite kitchen convenience:

1. Mr. ShoeFanatic informed me that he was craving "real" spaghetti & meatballs (I'm not sure if that was a jab at me and Prego or not)
2. I needed to clean out my pantry and
3. I was feeling crafty

So I went for it.

MEATBALL INGREDIENTS:
1/2 c bread crumbs
1/2 c milk
2 lbs ground beef
1/4 onion, diced
3 garlic cloves, diced
1 egg
1 c parmesan cheese, grated
Seasoning (salt, pepper, oregano, basil)

SAUCE INGREDIENTS:
Olive oil
1/4 onion, diced
1 bell pepper, cubed
1/2 jar sliced mushrooms*
6 garlic cloves, diced
1 sm can tomato paste
1 can stewed tomatoes*
1 lg can diced tomatoes*
Seasoning (salt, pepper, basil, oregano)

*I used what I had in my pantry because we all know that I hate running to the store. In a perfect world, I probably would have had 2 cans of stewed tomatoes and 8 oz of fresh sliced mushrooms. But my world is far from perfect.

To make the Meatballs:
Preheat oven to 400 degrees.

In a medium mixing bowl combine the bread crumbs with the milk. Let them soak for 10 minutes. Add the remaining ingredients to the bowl and mix thoroughly.

Form the mixture into meatballs (I made 23 of them). Place on sheet pans lined with parchment paper and bake for approximately 20 minutes. Add the meatballs to the simmering sauce about 15-20 minutes before the sauce will be finished cooking. Cover and let simmer. The longer they simmer, the better they will be!

To make the Sauce:
Coat the bottom of your pan in olive oil. Saute onions, bell peppers and mushrooms until soft and translucent; about 10 minutes. Throw in the garlic and let saute for a few more minutes.

Add tomato paste. Watch your heat; you don't want the paste to burn. Let the paste and veggies marry in your pot. This will put off an amazing aroma.

I should probably add that at this point I was supposed to deglaze with a splash of white wine. But I was concentrating on making perfect meatballs. So I forgot. Ever forget? Happened to me.

(Name that comedian.)

While the paste is marrying the veggies...put your stewed and diced tomatoes in the blender and puree. Pour this into the pot. Cover and let simmer for however long you like. But at least 30-45 minutes.

At some point you will taste it and it won't taste right and that's when you will toss in the rest of the seasonings. Give it a stir and keep simmering.

When everything is married and simmered and baked and you just can't stand smelling it anymore...

Serve over pasta with fresh grated parmesan cheese and enjoy.

VERDICT:
Has anyone ever given spaghetti and meatballs a bad review? I think not. And I won't be the first. This was good. Tomatoey, garlicky, messy...all the things good spaghetti should be.

What it was not was great. And that's entirely my fault. For starters, I should have added 1/2 cup more breadcrumbs to the mixture but I didn't read the recipe correctly. They were still good but I think the extra breadcrumbs would have held them together just a tad bit better.

The sauce was a little boring. I'm not sure what I did wrong though. Honestly, I think it just needed to simmer longer but I was starving. Next time, I will make this on a weekend so I'm not so rushed.

SOURCE:
Meatballs --Annie's Eats
Sauce--Me

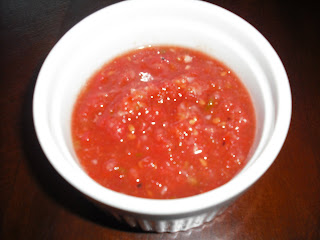
Homemade Salsa


Mr. ShoeFanatic has been yenning to make homemade salsa for quite some time. When I mentioned making Shrimp Tacos, he jumped at the chance to whip this up. It didn't take long at all and was amazingly fresh.

INGREDIENTS:
2 cans diced tomatoes
1 whole tomato, quartered
1/2 red onion, chopped
4 garlic cloves, chopped
1/4 c pickled sliced jalapenos
Juice of 2 limes
1 t sugar
1 t red wine vinegar
1/2 t salt
10 grinds fresh pepper
1/4 t granulated garlic
1 bunch cilantro (we left this out)

In food processor, pulse canned and fresh tomato until finely chopped. Remove tomatoes and pulse onion, garlic, cilantro and jalapeno until finely chopped.

Combine the processed mixtures and the remaining ingredients and refrigerate before serving. The longer this sits, the better the flavor.

VERDICT:
Hands down, this is the Best Salsa Ever. There were no crunchy raw onions yet it was chunky. Everything was very fresh. And it was so better the next day!

Eat your heart out, El Paso.

SOURCE:
Texas Highways Cookbook

Grilled Shrimp Soft Tacos


There has been a whole lot of hoopla regarding this recipe among a group of girlfriends. Christen, the creator, has a pretty fancy schmancy blog with some pretty yummy looking meals. So I trust her judgment in the kitchen. Plus I love shrimp and we all know about my love for Mexican food so this was really a win-win situation for me.

INGREDIENTS:
1 lb shrimp, peeled and deveined
Marinade (below)
Tortillas
1 avocado, sliced
Sour cream
Shredded cheese
Lettuce

MARINADE:
1 envelope McCormick's Baja Citrus Marinade
1 T water
2 T tequila
juice of 1/2 lime
2 T apple cider vinegar

Whisk envelope of marinade, water, tequila, lime juice and vinegar together in a bowl. Add shrimp and coat evenly. Transfer marinade and shrimp to a ziploc bag (I find it coats better). Keep refrigerated until ready to put on the grill.

Preheat grill to 400 degrees. Place shrimp on skewers (easy way) or directly on grates (lazy way) and grill for about 1 1/2 minutes on each side.

Make tacos using toppings of your choice.


Mr. ShoeFanatic thinks the cheese picture is "dressed down." I think it's super yummy looking so I put it anyway.

VERDICT:
Oh this was good. Very, very good. That marinade is freaking amazing. And Mr. ShoeFanatic's homemade salsa was better than most restaurants. It went very well with all the other ingredients.

Make this soon. Very, very soon.

Thanks, Christen!

ETA: We also tried this with grilled chicken and it was equally as good.

SERVED WITH:

SOURCE:

Monday, May 4, 2009

Menu Monday

Is it May already? Geez, this year is flying by. Here's what we are having for dinner this week. I am very excited about Thursday!

Monday--Spaghetti & Meatballs
Tuesday--Leftovers
Wednesday--Grilled Steaks & PW's Creamed Spinach (Mr. ShoeFanatic)
Thursday--PW's BBQ Meatballs & Mashed Potatoes
Friday--Leftovers
Saturday--Leftovers
Sunday--Happy Mother's Day! We're having boiled crawfish with Mr. SF's immediate family. There's 35 of them. Pray for me.

Friday, May 1, 2009

Pasta Salad


Update, 5/25/09: Finally got a picture up. Even if it is a crappy one. I'll try to take a better one later.

Update, 5/2/09, 12:00pm: Apparently there will not be a picture. Mr. ShoeFanatic thought it was SO good that he ate all the leftovers.

Spring has officially sprung here. I love, love, love pasta salad but for some reason, people always tend to put raw onions in it. And I hate raw onions. I started searching for a recipe a while back in hopes that I would either get invited to a BBQ or we would host one.

Ask and you shall receive! We were invited to a Private Practice finale/BBQ last night (can we all say cliffhanger?!) and I literally jumped at the chance to make pasta salad.

I didn't actually measure anything. I just eyed whatever looked right.

INGREDIENTS:
1 bag pasta shells
1/2 bag matchstick carrots
1/2 bag frozen peas, thawed
1 block colby jack cheese, cubed
1 cooked, ham steak, cubed

DRESSING:
1 packet dry ranch dressing mix
mayonnaise
sour cream
Splash of red wine vinegar

Bring a large pot of salted water to a rolling boil. Meanwhile...Depending on how long your carrots are, run a knife through them so they are bite size.

Boil noodles for approximately 7 minutes. Throw in carrots and boil for another 2-3 minutes.

Pour pasta/carrots into a colander but DO NOT RINSE. You want the starch so the dressing sticks better. Set aside. Or put in the fridge so it can start cooling down. If you do this, you'll want to run your spatula through it fairly often as the outside pasta will cool but the inside pasta won't. Makes sense? Good.

While water is boiling and noodles are cooling...

Whisk together ranch, about a cup of mayo (you will probably add more later) and 2 heaping spoonfuls of sour cream. Whisk this together until you have the desired consistency. When the consistency is right and you feel like it tastes good but it could be just a little better...throw in that splash of red wine vinegar. Whisk some more and it should be just right.

In a large bowl, mix your peas, ham, cheese and cooled pasta/carrots. Fold in the dressing, making sure you coat all the shells. Stick it in the fridge until you are ready to serve.

VERDICT:
Yum, yum, yum. This was sooooo good! I was actually worried about the dressing because originally the ranch flavor was really overpowering but then Mr. ShoeFanatic swept in and saved the day with his additions of sour cream and red wine vinegar. That sealed the deal.

This recipe is definitely one of those "free for all" kind of dishes. You could use whatever veggies you have on hand and I also think that you could get away with just using a bottle of creamy italian salad dressing.

Whatever you do, make this soon.

Source:
Amber's Delectable Delights